3-D printing refers to a variety of processes in which a computer is used to control the addition of material layer by layer to create a 3-D object. The term refers to a variety of techniques, and the term “additive manufacturing” is used to encompass the various methods currently in use. Typically, the process begins with an object being designed using CAD (computer-aided design) software. Three of the most popular 3-D printing processes are fused deposition modeling (FDM), selective laser sintering (SLS), and stereolithography (SLA). FDM is the 3-D printing process that’s used most frequently and is the type of printers we have in our library.
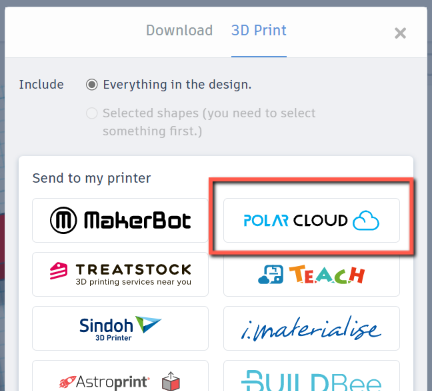
Your design will be sent to Polar3D. Select "3D Print"
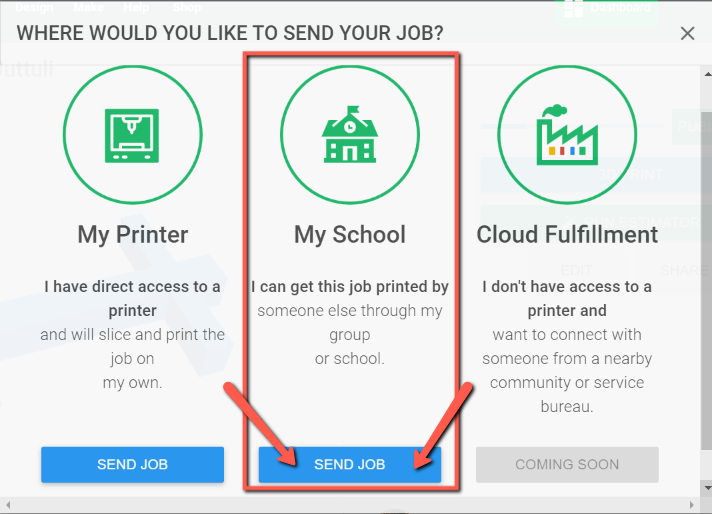
Select "Send Job" in the "My School" column
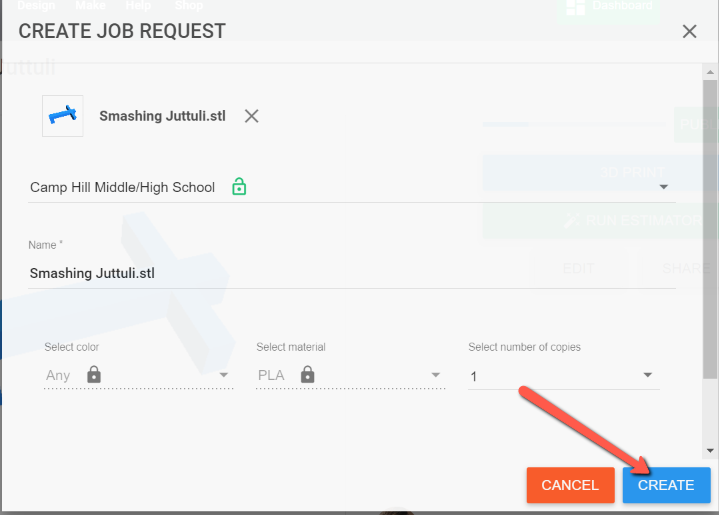
Rename your job (if you'd like) and click "Create"
All items will be printed in white so you can paint them any colors you’d like. We will send you a message in Schoology as soon as your design is printed or if we are unable to print your design.